
It’s time to update your destination’s video and you’re considering some aerial footage. In the not too distant past, you needed to rent a helicopter or plane to capture gorgeous aerial footage. Luckily, things have changed. With the advent of the quadcopter, now more commonly known as a drone, it is now possible to fly at much lower altitudes and capture stunning video and photography more efficiently than ever before. The most basic rig can tuck easily in the trunk of a car and, except for the buzzing of the propellers, is much more efficient, flexible, and less conspicuous than every previous option for capturing overhead and aerial footage. You’re probably asking yourself, should my DMO buy one of these for ourselves to fly or should we hire a professional? Let’s explore both options:
Buying Your Own
There are MANY options when it comes to buying a drone. My recommendation is to take a close look at the DJI brand with a few different options and price points to choose from. Their Phantom 3 starts at around $500 and their top-of-the-line Inspire 2 tops out at about $3,000. Both come with everything you need including the proprietary camera and a remote. Except in the case of the new Phantom 4 Professional, you will need a smartphone or a tablet to connect to the remote. So now you have it out of the box… let’s go fly! Not so fast. The FAA has recently passed a set of rules and regulations regarding the use of drones or what they call a Small UAS (Unmanned Aircraft System). You can find out more information on this at their website http://knowbeforeyoufly.org. Basically, if your drone weighs more than the equivalent of two sticks of butter (or .55lbs) then you MUST register it with the FAA before you fly. It is a fairly simple process to register your UAS. You must choose whether you’re flying it for recreational use or commercial use. If it’s recreational, once you register it, you’re done. If it’s commercial (and if you are going to use the footage in a promotional video for your destination, you are a commercial user), then there’s a little more to it than just registering. Flying a drone for commercial use requires the pilot to pass the Aeronautical Knowledge Test. It’s a 60 question exam that tests your knowledge of weather and micro-meteorology, airspace classes, reading sectional charts, airport operations, aeronautical decision making, etc. Test preparation could take as long as two weeks. If you are interested, there are various online courses to help you study for the test; one such course that I’m familiar with can be found at http://uavcoach.com. I recommend taking one of these courses and going through it several times before you attempt to take the test. There’s a lot of info included that might feel like it won’t apply to you at first, but the more I fly, the more I use the things I learned, especially the part about reading sectional charts. Sectional charts are basically maps of the airspace all around the world. They will allow you to determine where you’re allowed to fly, and whether you need special permission to fly in your area. In addition to taking the test, you need to follow certain rules.
- Maintain visual line of sight.
- Stay below 400' above ground level. Note: this limit is PLENTY high for shooting footage suitable for a destination video, the best drone footage I have gotten so far was between shot between 100' and 200' high.
- Do not fly directly over people, unless they are actively participating talent.
- Often flying in the late afternoon and early morning will result in the most appealing footage BUT do not fly past daylight hours (except for 30 minutes before sunrise or after sunset, and only then if you have crash avoidance lights).
- If you plan to fly in Class B, C, D, or E airspace, you will need to call in advance for permission from Air Traffic Control. Officially, you need permission from the airport in advance. See the FAA site for how to do this before you plan to fly.
A full set of the rules can be found here. Okay… NOW you’re ready to fly! I recommend spending some time getting used to flying your aircraft in a wide-open space with no buildings or power lines. Start by taking off and hovering about 6 feet off of the ground. Practice turning, moving left and right, forward and back. Get a good handle on where all the controls are and how they react to subtle movements. This is a precision instrument and sometimes reacts faster than you think!
Hiring A Professional
So you’ve read through the section above and think, “Okay, that’s more time, money and effort than I’m willing to invest to get a few shots a year.” Well, thankfully there are folks who have put in the time, money and effort and, on top of that, they are often top-notch photographers and videographers to boot! So what should you look for in a drone pilot? First, check out their work. Most remote pilots will have a website or a YouTube channel where you can see footage they have captured. Does it look cinematic? Is it stable? Do the colors look good? And keep in mind, some pilots might already have the footage you’re looking for. And if they were shooting this for their own portfolio, they may have already shot it in the perfect light with perfect weather! The second thing you should ask is whether they are FAA certified. You certainly don’t want to get in trouble for using a pilot that is not cleared to shoot commercially. The fines could pose a big headache, and the potential liability and dangers could be even more serious. Okay, so whether you’re flying the bird yourself or you’ve hired a professional, you’re going to want to make a shot list. Here are a few things to try:
The Backwards Reveal
This might be one of my favorite shots because you build anticipation, then it peaks with the reveal of your subject.
The Lift and Turn
This one is good for when you want to start out with a subject and then show off its surroundings. Great for golf courses, cityscapes, theme parks.
The Orbit
This is great for when you really want to show off your subject.
The Panorama
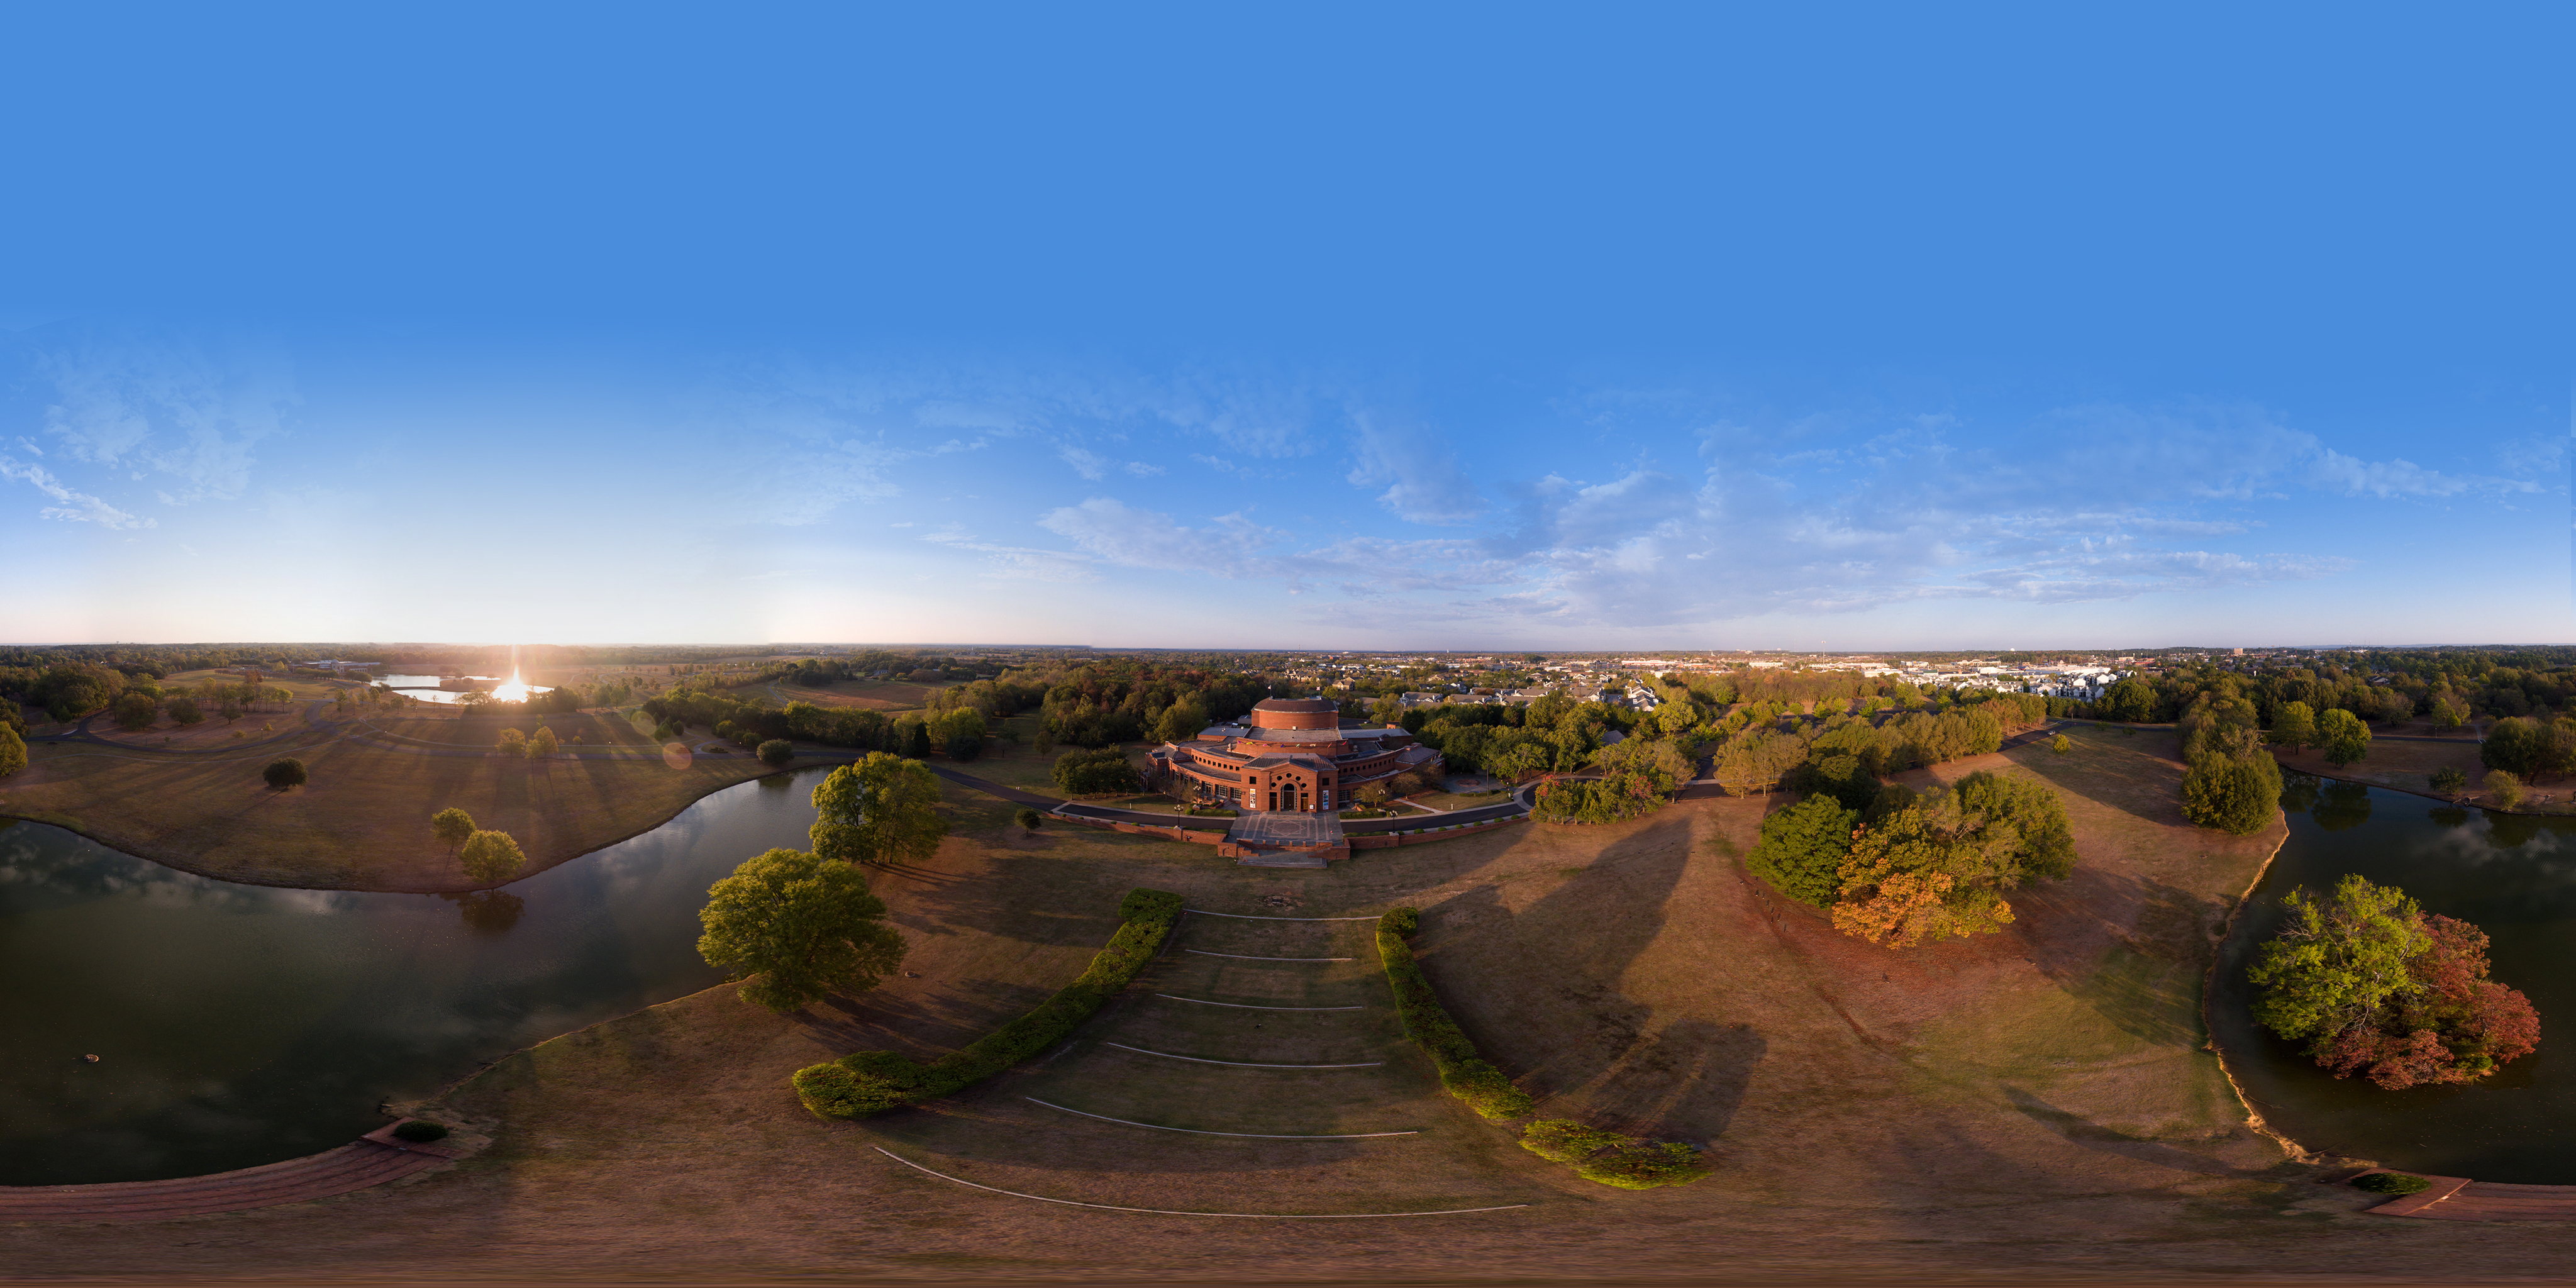
Another great option is to take several photos and make a panorama. When you’re done you can stitch them together in a program like AutoPano and output them as an equirectangular photo-ready for viewing in VR! Good luck with your own projects. We’d love to see what your DMO does. Be sure to let us know how it works out!